REQUEST YOUR FREE ESTIMATE
Be Safe and Choose MoldCure Pro for Expert Mold Removal
START HERE or call (973) 228-2500


Choosing a Mold Abatement Contractor
When choosing a mold abatement contractor the best advice is the use of common sense.
1. Ask for a copy of your contractors Certifications for the following credentials:
- Indoor Air Quality Inspector
- Indoor Air Quality Specialist
- Mold Inspector
- Mold Remediator
2. Request a Certificate of Insurance from your contractor for the following coverages:
- Workers Compensation
- General Liability
- Pollution
- Professional Liability
- Auto Insurance
3. Consider using a “Third Party” – mold testing firm to eliminate the conflict of interest when validating mold remediation is required.
4. Choose firms who offer at a minimum a “One Year Warranty” on the work performed.
5. Choose contractors who incorporate the use mold cleaning agents and coatings which are free of bleach, ammonia’s and VOC’s.
Dehumidifcation is Remediation
If all homeowners with a basement installed a dehumidifier, much of our work would dry up.
The simple remedy to preventing mold fungi formation is to control the level of relative humidity. The dehumidifier will electronically remove water vapor from the air in a confined space.
The dehumidifier will not only work well with air conditioning, it will save you money. The air conditioning system (AC) will operate much more efficiently by allowing the dehumidifier to remove water vapor instead of the AC condensate pump, thus cooling dryer air instead of moist air. This dynamic allows clients to set thermostats higher in the summer creating a demand for less energy, lowering costs and paying for the dehumidifier over time.
Should I Install a Dehumidifier?
If all home owners with a basement installed a dehumidifier, much of our work would dry up.
The simple remedy to preventing mold fungi formation is to control the level of relative humidity. The dehumidifier will electronically remove water vapor from the air in a confined space. The dehumidifier will not only work well with air conditioning, it will save you money. The air conditioning system (AC) will operate much more efficiently by allowing the dehumidifier to remove water vapor instead of the AC condensate pump, thus cooling dryer air instead of moist air. This dynamic allows clients to set thermostats higher in the summer creating a demand for less energy, lowering costs and paying for the dehumidifier over time.
Our Process – Surface to Air
At MoldCure Pro it all starts with choosing a “SAFE” product. It’s true that most professional grade anti-bacterial, fungicides and mold inhibitors on the market can be just as toxic as the mold fungi targeted for remediation. However, we do not fight fire with fire.
True to our commitment to “Choose Green First”, we utilize a patented solution comprised of naturally occurring salt. Once applied or fogged, our product dries into an invisible polymer that kills and prevents new mold growth. Our solution does not contain ammonias, chlorines, VOCs or alcohols or any harmful chemicals and has received the safest toxicity rating, CAT-4 on the EPA Rating Scale. Our finishing product has been used since the Dark Ages and is applied via fine micron mist air treatment fog or ionizer; so rest assured your mold will be gone leaving your home fresh and ready to live in.
Q&A
What is Mold?
Mold is a fungus, two or more organisms are fungi. Molds are part of the natural environment outdoors, molds play a part in nature by breaking down dead organic matter such as fallen leaves and dead trees.
Molds critical need for survival – There are over four thousand types of mold and none of them grow without water, moisture or high levels of humidity.
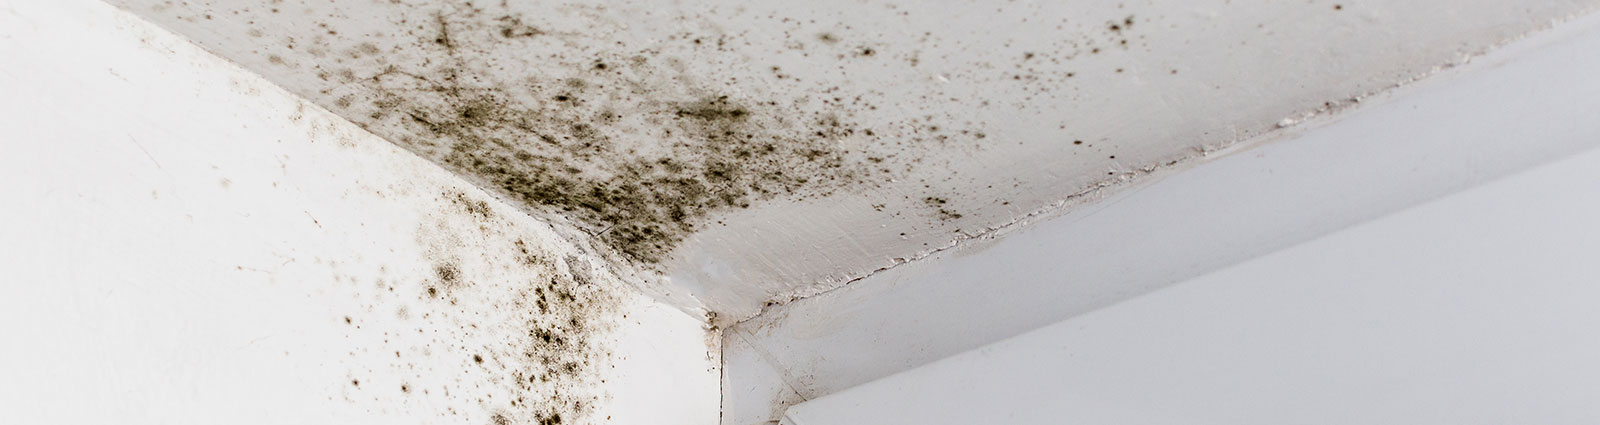
What does mold look like?
Mold grows like any plant in four stages:
1. A growing organism
2. Produces a “tree-like” structure
3. From which come spores to settle out and grow to continue the cycle
4. Color variations range from green, yellow, red, orange, white and black
Outdoor vs Indoor Air Quality-
Mold spore counts (outdoors) are elevated at certain times of the year, especially in the fall when leaves fall and begin decomposing. Most people are aware that outdoor air pollution can damage their health, but many do not know that indoor air pollution can also have significant harmful effects.
The US Environmental Protection Agency (EPA) studies of human exposure to air pollutants indicate that indoor levels of pollutants may be 2-5 times, and occasionally more than 100 times, higher that outdoor levels. Indoor pollutants can be trapped without regular air exchanges, open windows or ventilation.
Testing outside air quality compared to inside air quality can be one of the most important steps of a remedial process.
Mold Needs and Likes-
- Nutrient source – Mold feeds on organic materials in a structure, such as wood, paper, drywall, insulation and natural fibers
- Ideal temperature – Molds generally grow best in common building temperatures between 68⁰ and 86⁰ F. (Some molds, however, grow in cold temperatures, even down to 32⁰F, while others thrive in temperatures over 100⁰F
- Ideal humidity- Most molds can survive in a relative humidity level as low as 65%. To prevent most mold growth, indoor relative humidity should be maintained between 30% and 50%
How fast can mold grow?
When moisture is introduced inside of a structure and the relative humidity begins to rise above 60% -spores can germinate after only 24 hours. Most molds begin germination in 24-48 hours.
Mold colonization may take 1 to 12 days depending on the type of mold and conditions.
Finding Hidden Mold
Case Study #1
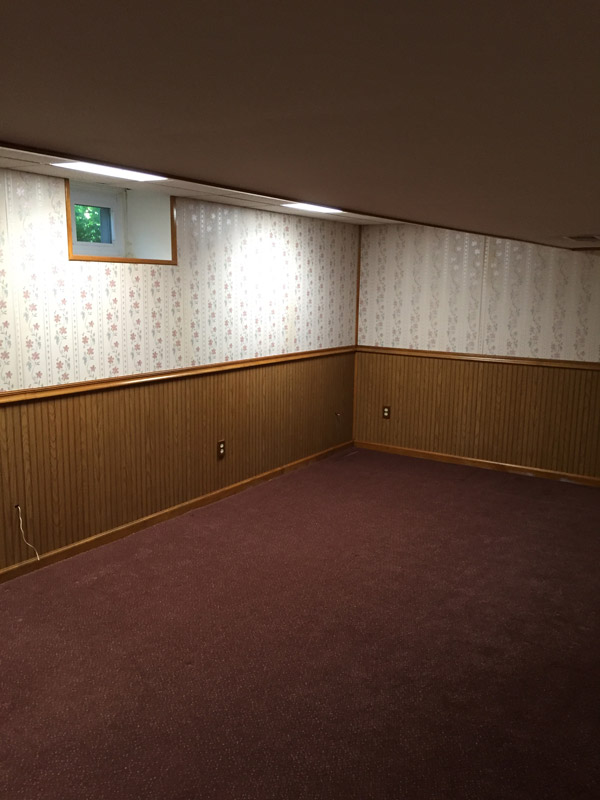
Treatment Area: Finished Basement with paneling and wall paper
Conditions Conducive to mold: Water on carpeting from a storm in the past, elevated humidity.
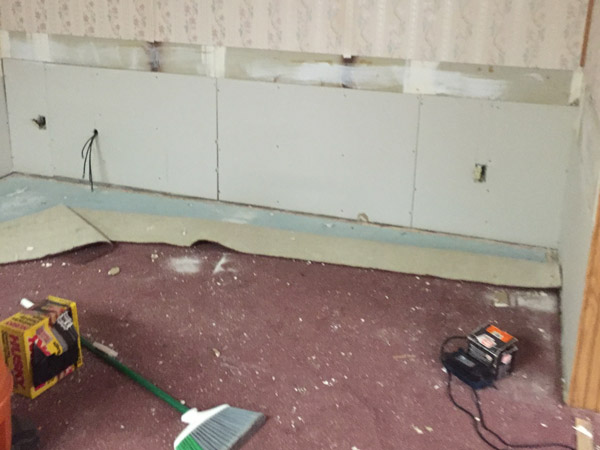
Visual Inspection – A homeowner is preparing their home for sale. Dial Environmental is contacted to perform a visual inspection. There is a noticeable musty odor in the basement, but no visible mold. A hygrometer is set up to measure the relative humidity and the reading is almost 70%, elevated and conducive to mold growth. The current dehumidifier is not working and it is late in May and the heat is turned off.
After a few questions, the homeowner provides a critical clue; there was water in the basement a couple of years ago. The carpet was wet, dried out and cleaned by a professional.
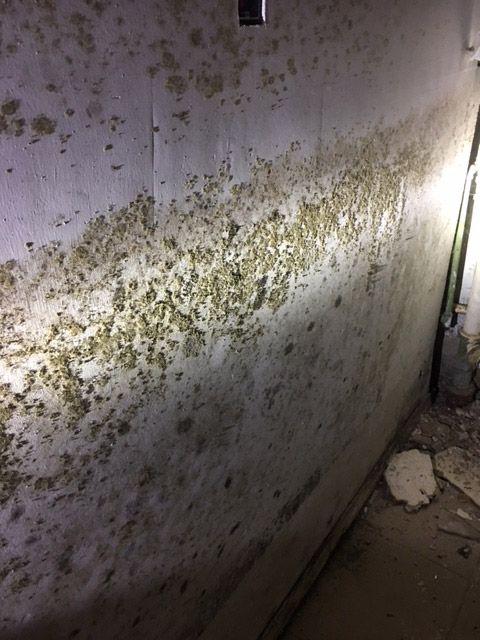
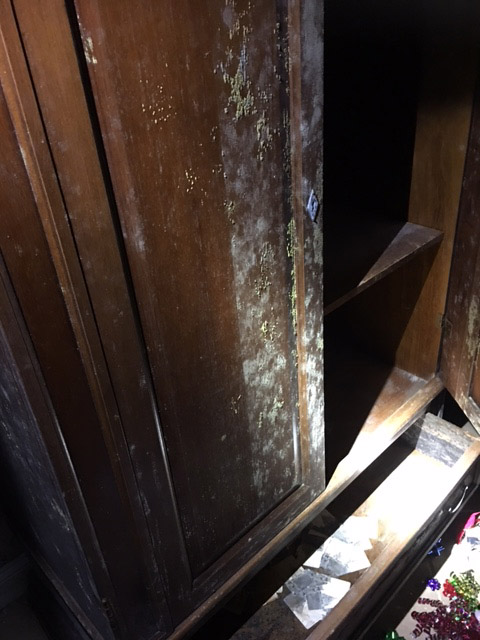
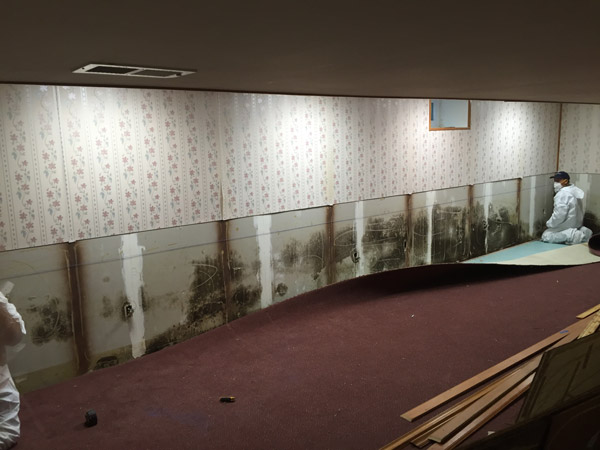
Further Discovery – We suggest removing a small section of half wall paneling to “take a peak” behind it. Photo #2- in this series clearly shows mold fungi formation on the back side of the paneling and the drywall paper behind it. The homeowner was shocked but grateful that we uncovered the potential problem before the home was listed.
The mold formation resulted from “wicking” of moisture at the lowest point of the basement wall vertically up to 24 inches in height. We find in many cases that mold thrives between layers of cellulose material. In this case, the back side of the unfinished wood paneling and the drywall paper. A perfect storm.
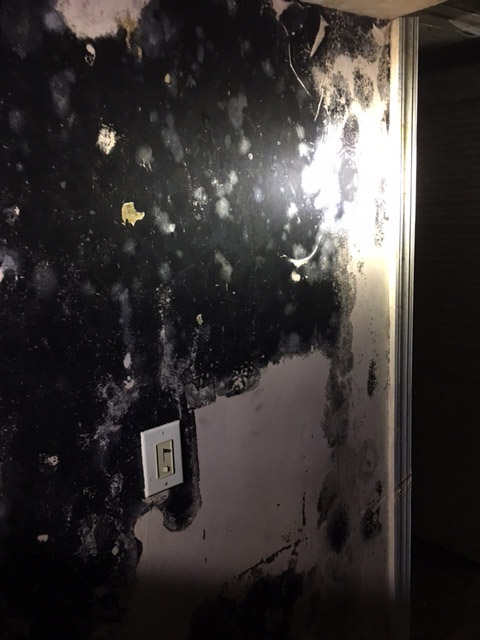
Remedy – A chalk line was snapped a few inches above the highest point of mold formation on each wall. The drywall was cut out and removed. The back side of the drywall also showed mold formation but was well below the height of the exposed front side of the drywall covered by the paneling.
The entire carpet was removed which revealed visible mold on the back side, with black staining on the wood carpet tacks, which was also removed.
Cost Savings – The back side of the paneling affected by mold was cleaned with a three (3) step process:
- Mold cleaning of surface mold
- Mold staining treatment of imbedded substrate
- Mold inhibitor encapsulate applied to the treated paneling
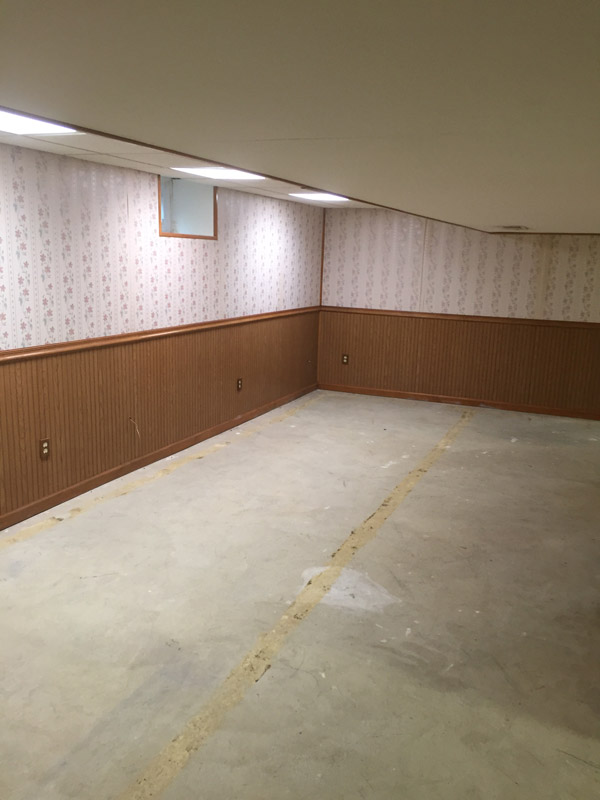
The new drywall was installed and the treated paneling was installed to cut the cost of spackling and painting the drywall.
The exposed concrete floor was treated with a surface cleaning antimicrobial and the paneling was reinstalled, back to its original state.
Process & Protocols
Day One
1. 6 mil plastic containment of the basement door with access zipper was installed to quarantine the work zone and prepare for clearance testing
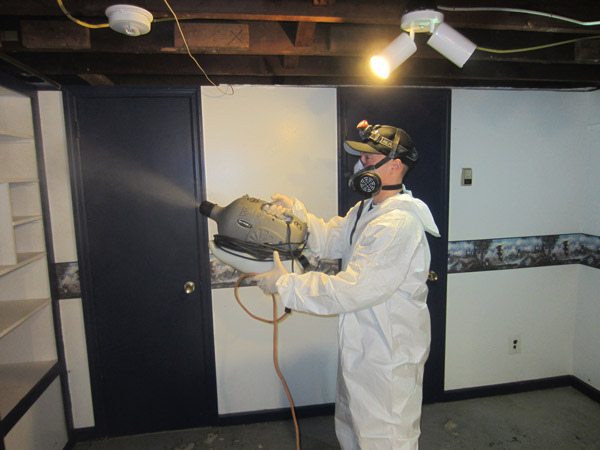
2. A pre-remediation suspension fogging was applied to the airspace of the basement and let dry overnight
Day Two
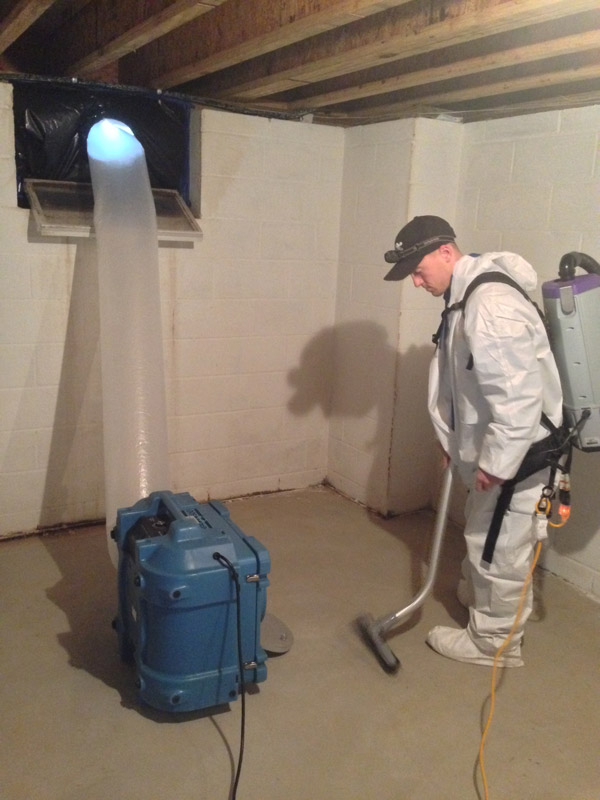
3. HEPA Air Scrubbers (2) were installed and vented to outside through windows- negative pressure
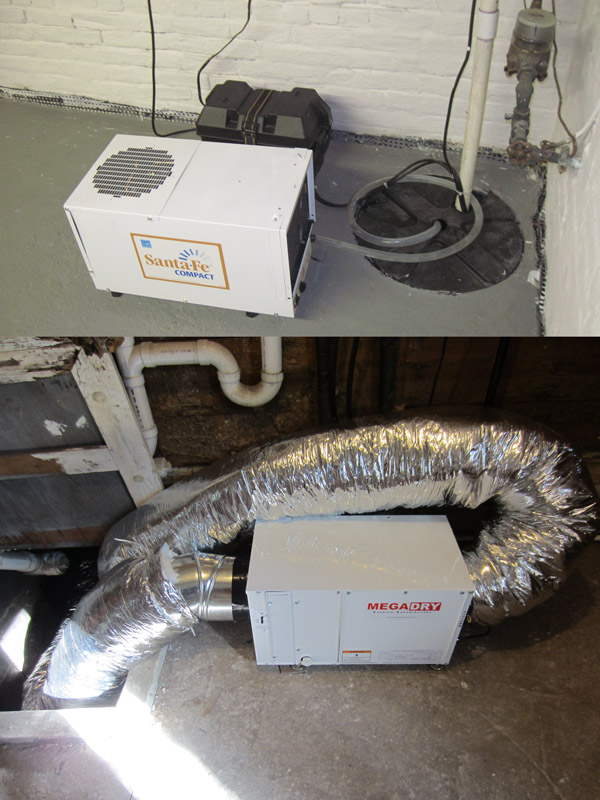
4. Install Professional Grade Dehumidifier to basement and discharge directly into sump pump
5. Removal and numbering of paneling and trim was completed for cleaning and reinstall
6. Drywall was marked, cut and removed from dwelling in sealed plastic
7. Metal studs were wiped and cleaned
8. Exposed concrete foundation was surface cleaned and treatment with mold inhibitor
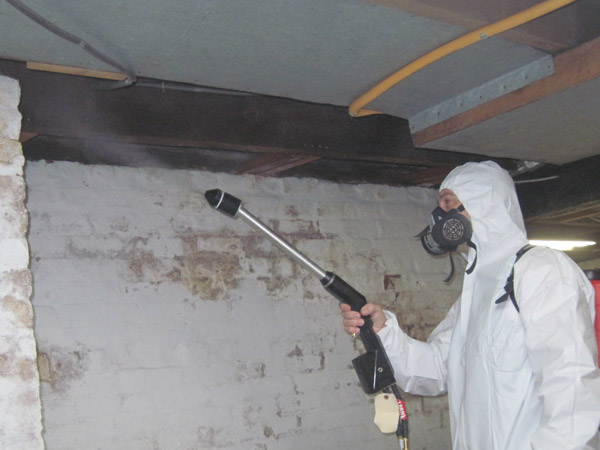
9. The exposed back side of the drywall above the demo line was treated with electrostatic fogging to adhere an antimicrobial to the surfaces of the drywall and foundation through the small 6-inch gap between the foundation and the wall
10. Carpeting and carpet tacks were cut in rolls, bagged and removed from dwelling
11. All drywall screws were removed to prepare for new drywall
12. All wall surfaces, ceilings, and floors were HEPA Vacuumed to prepare for new drywall installation
Day Three
13. Clean unfinished side of wood paneling and moldings with mold cleaner and wipe surfaces dry
14. Apply mold stain remover to unfinished side of wood paneling and moldings -wipe surface dry
15. Let paneling and moldings -dry out
16. Install new drywall to the base walls
17. Apply mold inhibitor encapsulate to backside of paneling and molding
18. Install paneling and molding to finish work
19. HEPA Vacuum walls and floors
20. Apply antimicrobial cleaner fogging the concrete floor
21. Allow HEPA Air Scrubbers (2) to filter air for 72 hours
22. Allow Dehumidifier to dry out space for 72 hours
Day Six
23. Turn off HEPA Air Scrubbers (2) to allow basement to de-energize
Day Seven
24. Have third party mold testing firm test outside air to establish a baseline for interior testing
– Conduct direct surface sample in basement
– Conduct air testing of basement
*Dial Environmental Inc. will not perform testing on our own work as we view this as a conflict of interest. Our company policy is to encourage our clients to secure a private company to perform initial discovery testing and post remediation verification (PRV) clearance testing to validate our work and provide favorable third party testing to our clients.
Case Study #2
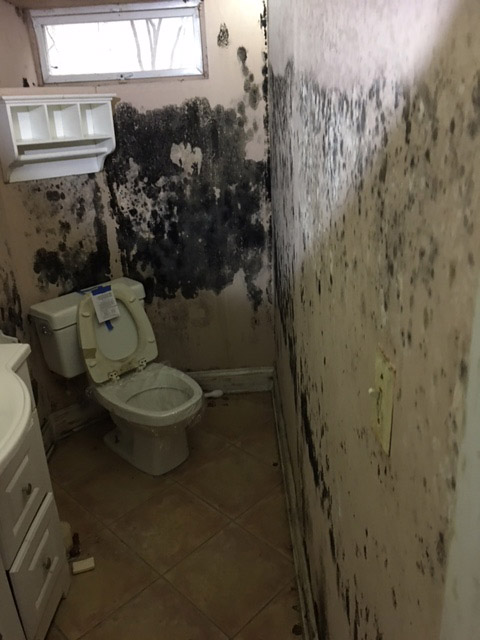
Treatment Area: Finished basement bathroom
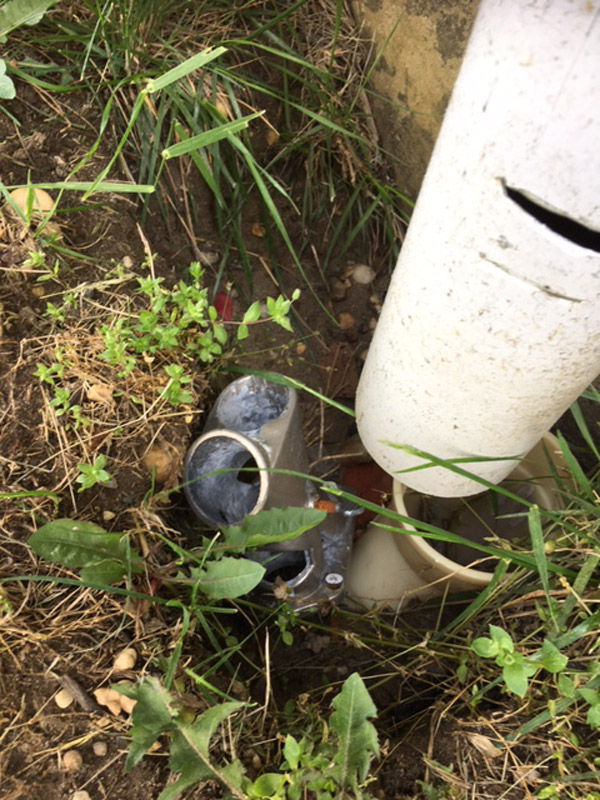
Conditions Conducive to Mold: Basement window at soil level, leader drain from gutter dumping water along foundation and leeching into basement wall
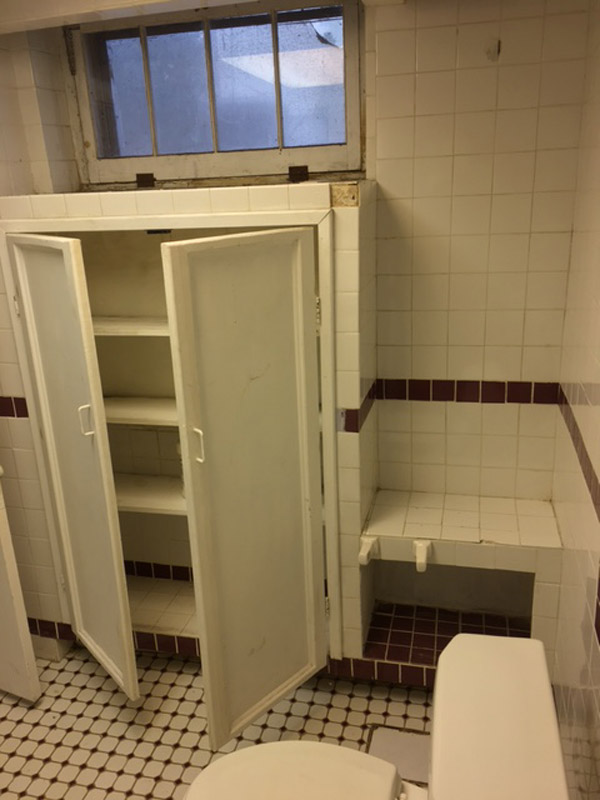
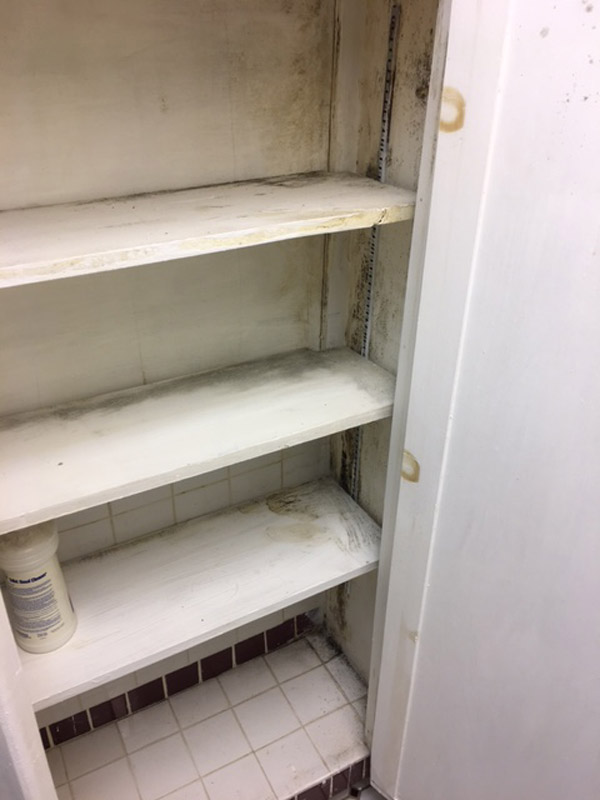
Visual Inspection – Client contracted a structural inspector to assess water intrusion into the basement. Inspectors report reflected the possibility of ground water leaching into foundation and basement window; impacting the basement bathroom. Our visual inspection uncovered mold forming inside of a bathroom storage area, built in. The unit is attached to the wall where the basement window is visible just above.
Further Discovery – We suggest removing the built-in storage unit after our moisture meter detects a high level of moisture in the wood. The doors of the storage area are normally closed, trapping high humidity inside the unit.
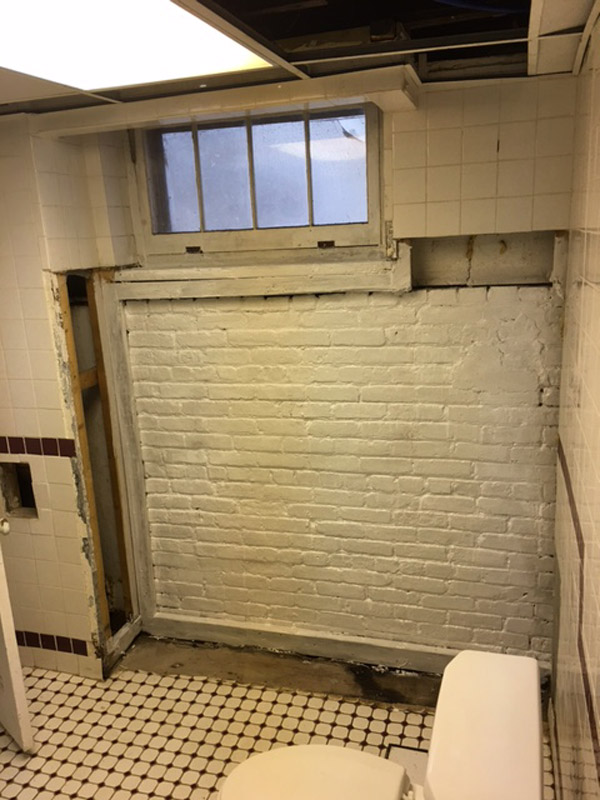
Remedy – A leader pipe was discharging rain water directly into the soil adjacent the basement window. This drain issue was corrected prior to our work. We recommended the area dry out at least 2 weeks prior to our arrival.
Cost Savings – Our targeted approach of removing a detachable wall section saved our client big bucks. The open cavity was framed by the client’s contractor and the tile was matched to limit the cost of reconstruction while solving the problem. Green board mold resistant sheetrock was recommended and utilized. Metal studs were used instead of wood to limit future mold growth.
Process & Protocols
Day One
1. 6 mil plastic containment of the bathroom door with zipper access to quarantine work zone
2. Pre-remediation suspension fogging applied to the airspace and let dry (small space 1 hour)
3. HEPA Scrubber installed and vented through bathroom window to outside creating negative pressure
4. Remove wood framing tile and built in shelving
5. Remove rotted wall studs beneath window
6. Remove all old nails and screws for reinstallation of new sheetrock
7. Treat exposed foundation with mold cleaning wipe dry
8. Treat exposed foundation with mold stain remover and wipe dry
9. HEPA Vacuum walls, ceiling, and floor of bathroom
10. Install Dehumidifier in bathroom discharge into tub drain
11. Install fan to dry foundation
Day Two
12. Apply mold inhibitor encapsulate “white” to dry foundation cavity
13. Remove plastic containment
14. Remove HEPA Air Scrubber
15. Remove Dehumidifier
16. Remove fan
17. Complete simple targeted remediation
Resource Center:
- EPA Mold Guide – Environmental Protection Agency
- Molds in the home. What Should You Do? – Michigan State University